
Adding a New Device to Plan
Steps to add a new device to a plan
-
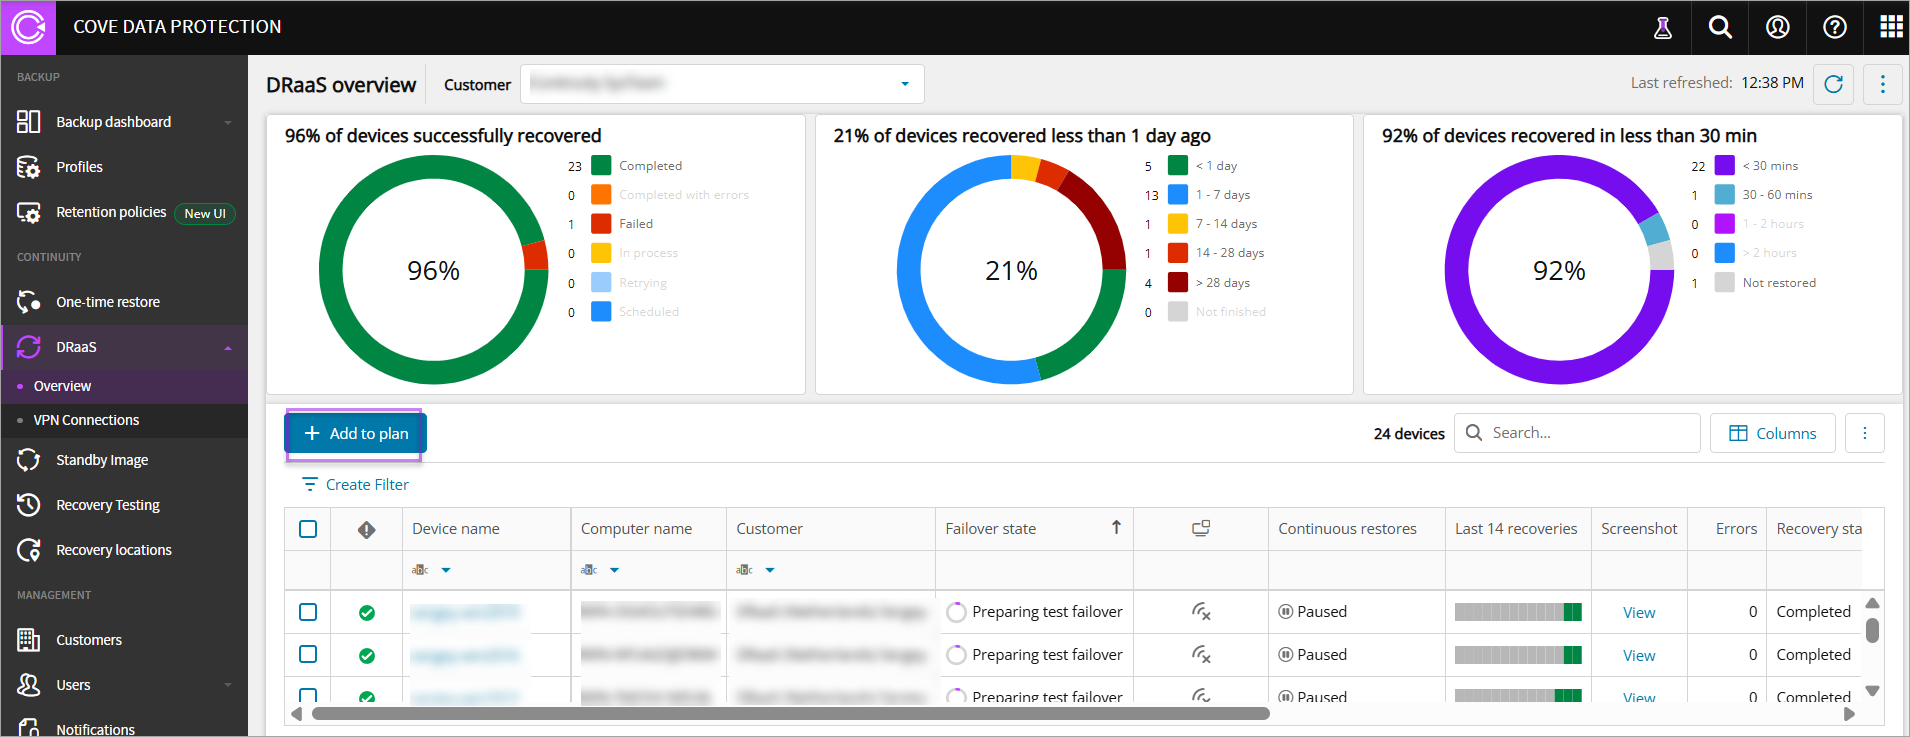
Click Add to plan in DRaaS overview dashboard to add a new device to Cove DRaaS plan
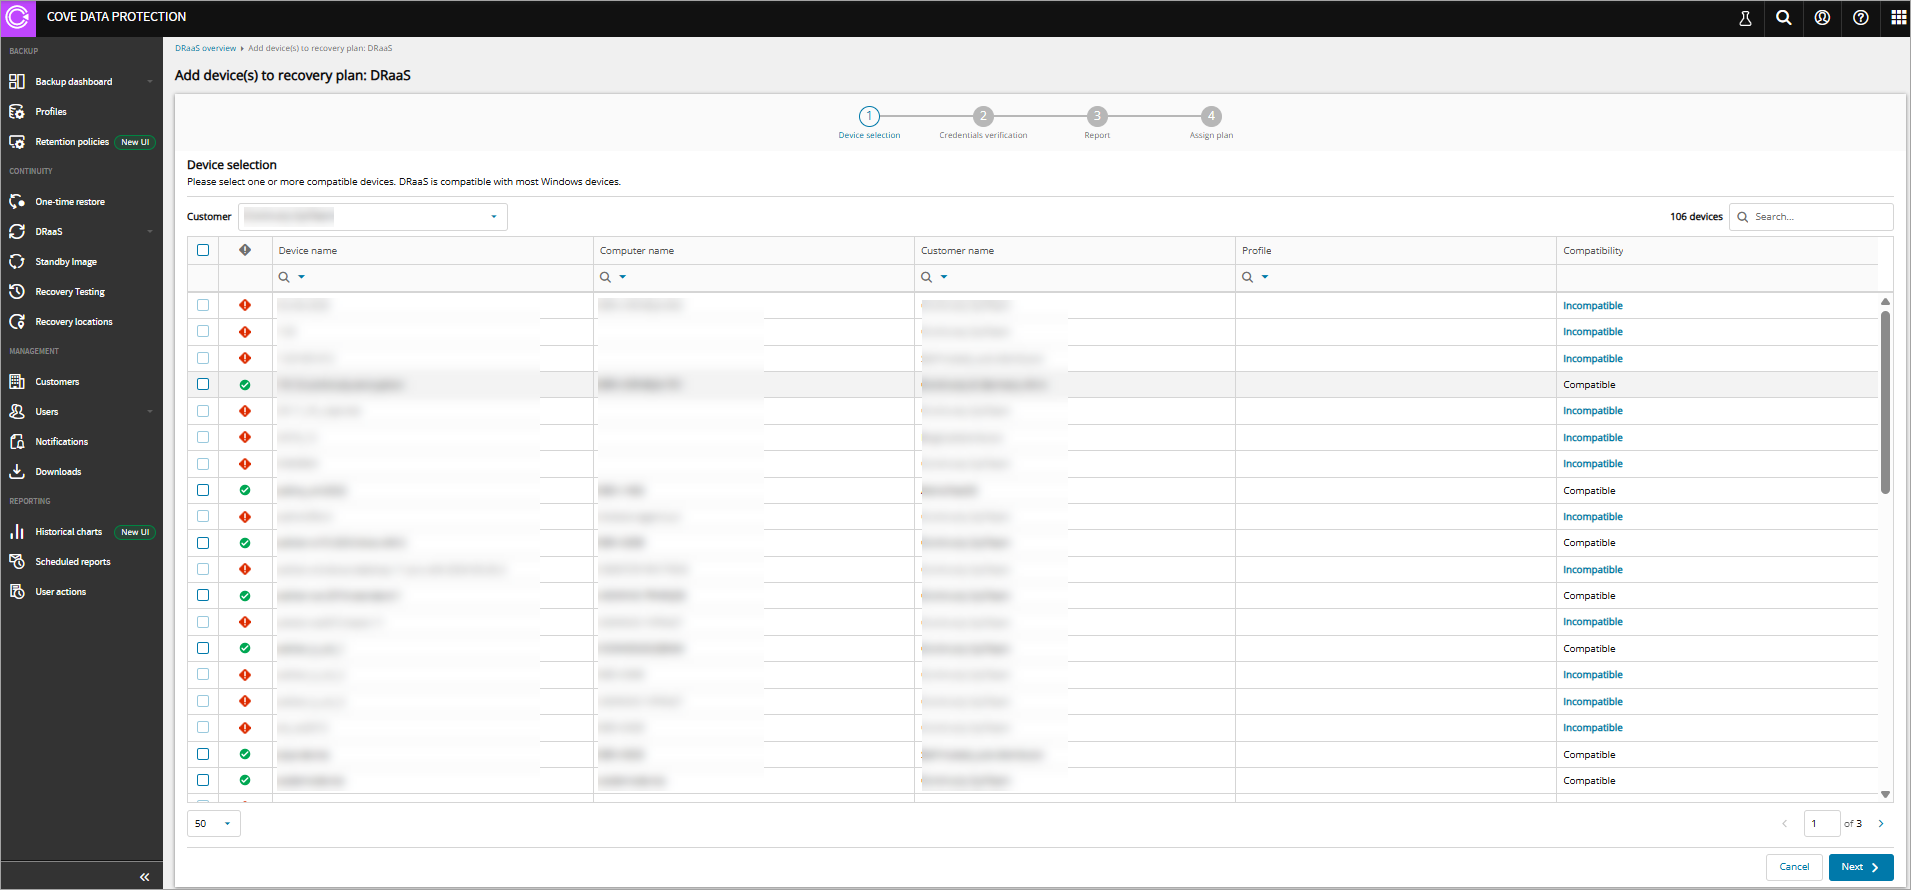
The Add devices(s) to recovery plan: DRaaS page displays which includes four steps:
-
Device selection
-
Select a specific Customer from dropdown, select a Compatible device from Device name column, and click Next
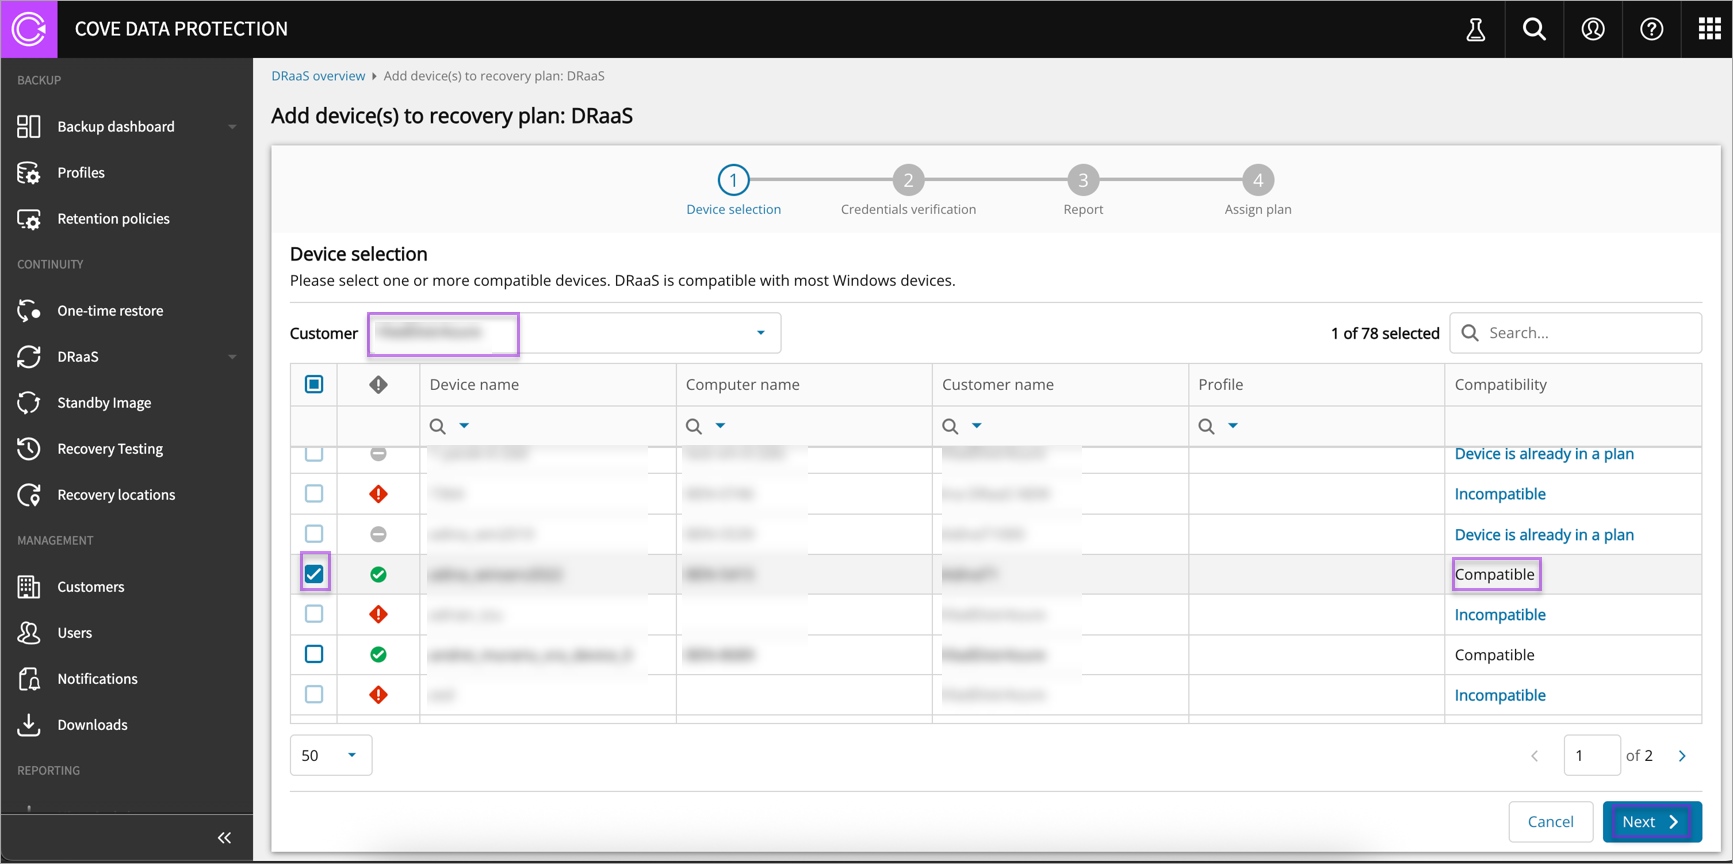
The compatibility logic is independent of devices added to other plans. Therefore, a device can be added to Recovery Testing/Standby Image and DRaaS.
-
-
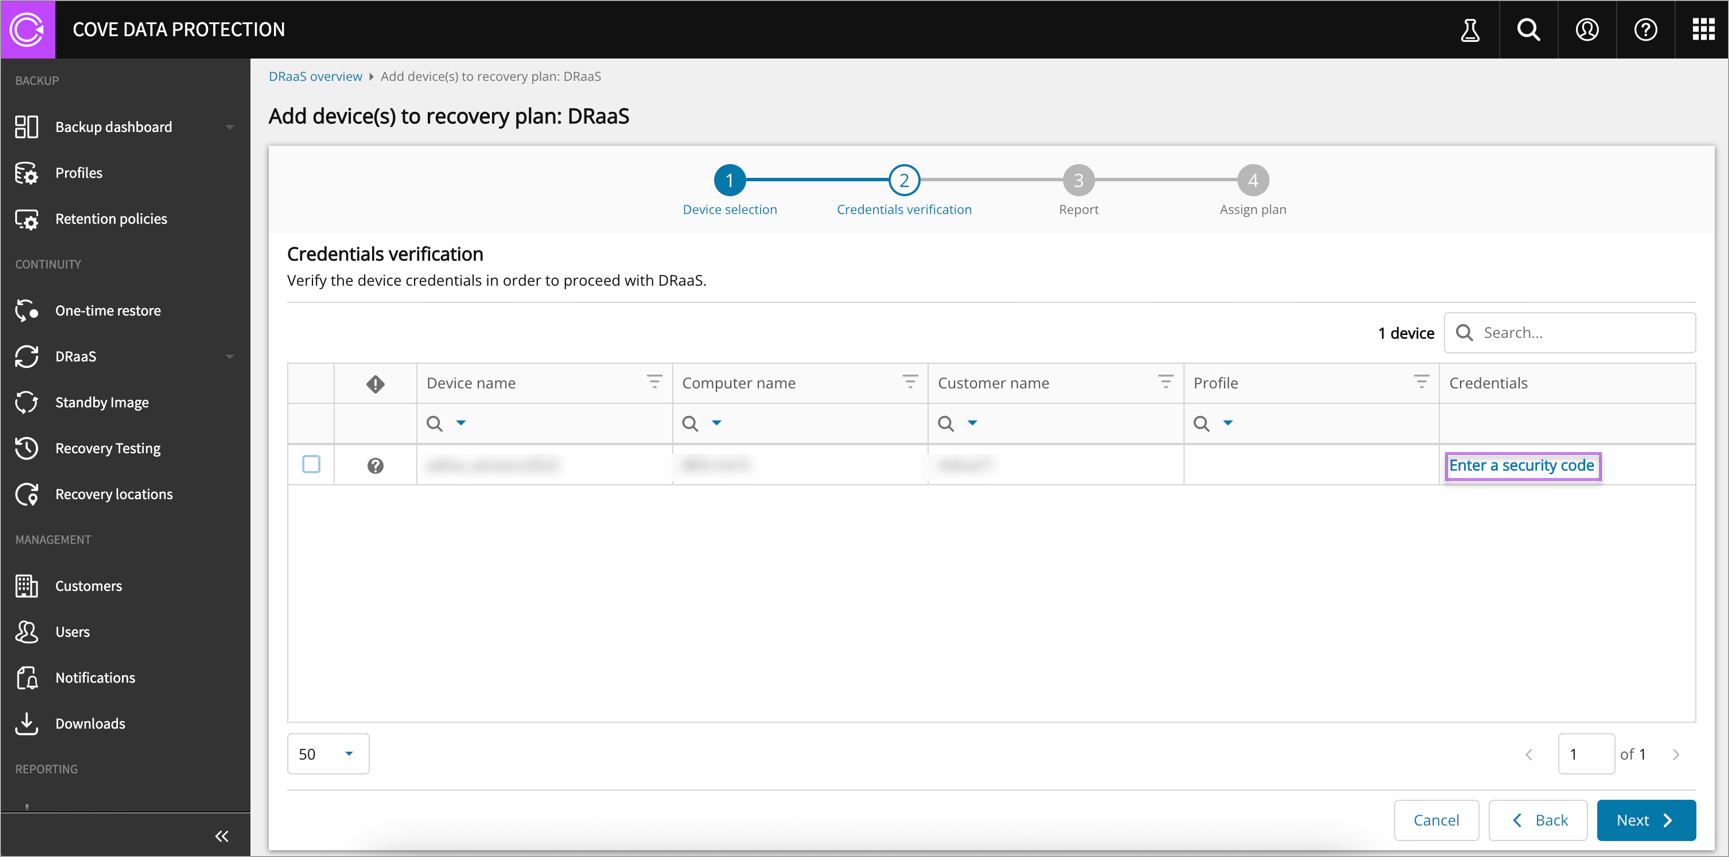
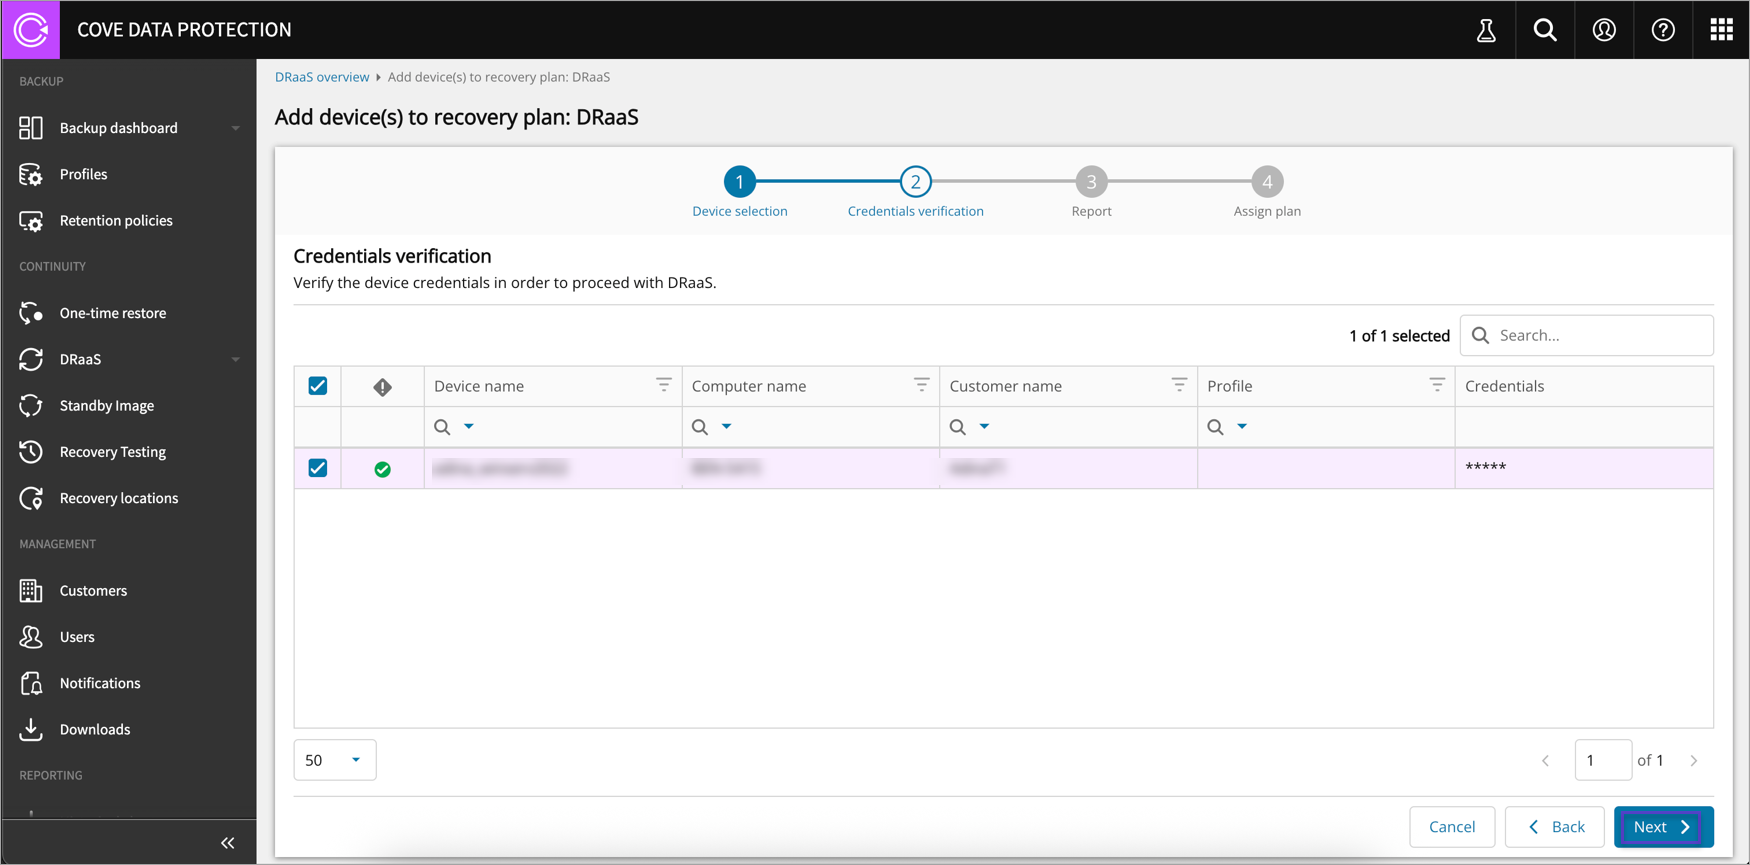
Credentials verification
-
Click Enter a security code for the selected compatible device
-
Enter Security code and click Apply

-
Click Next
-
-
Report
-
Enter the email of the recipients who will receive successful and failed recovery reports and click Next
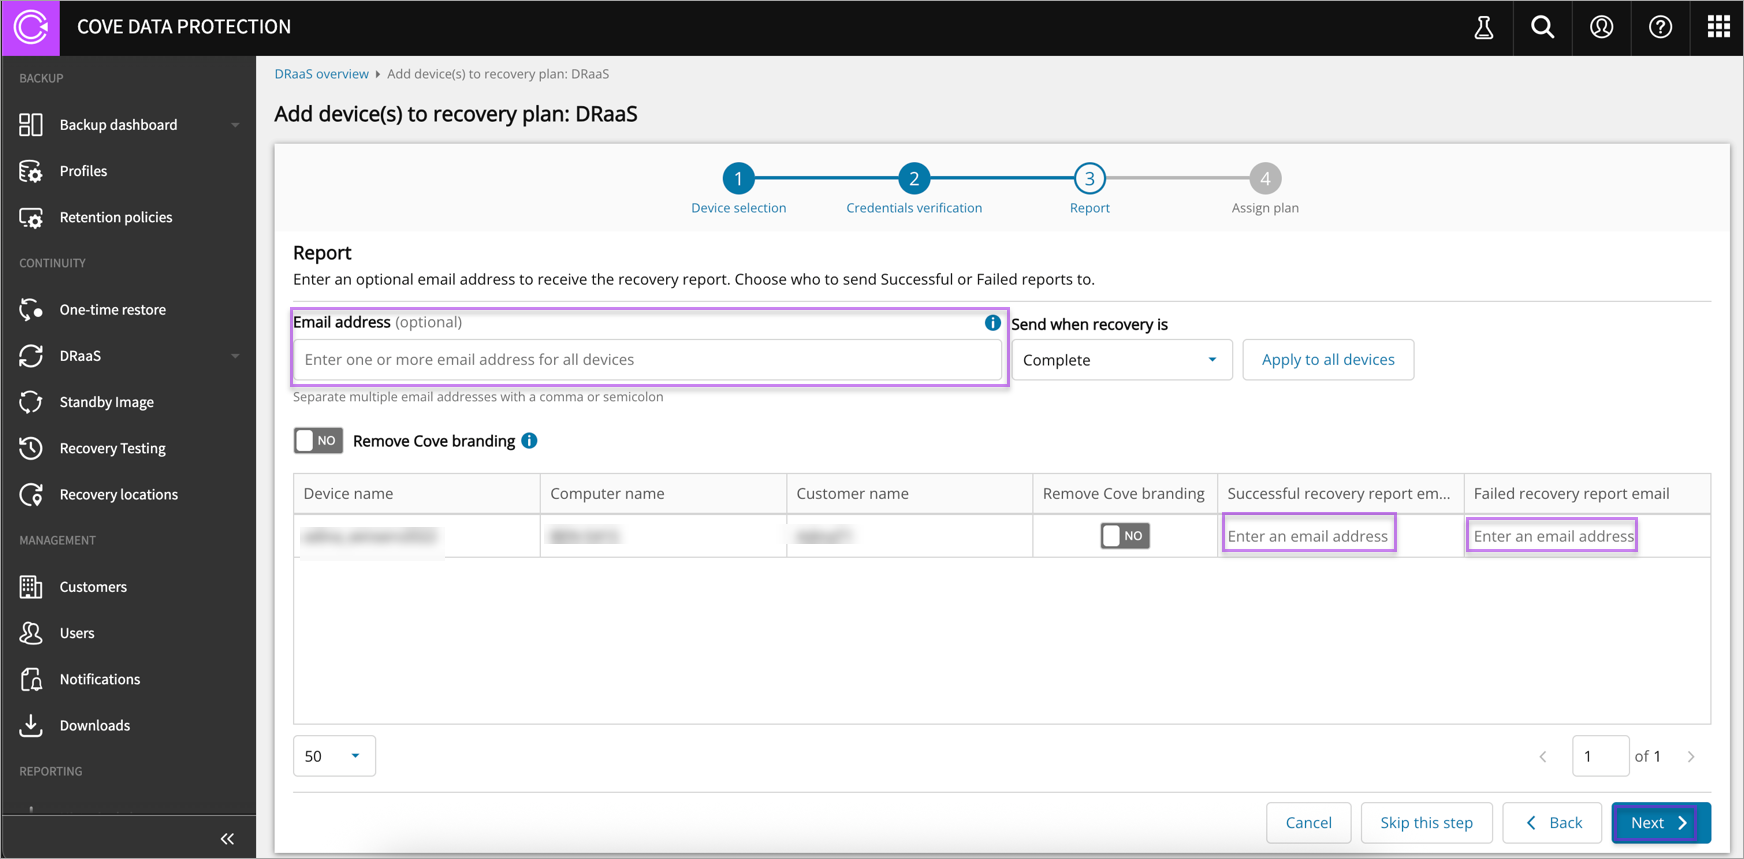
This is an optional step.
-
-
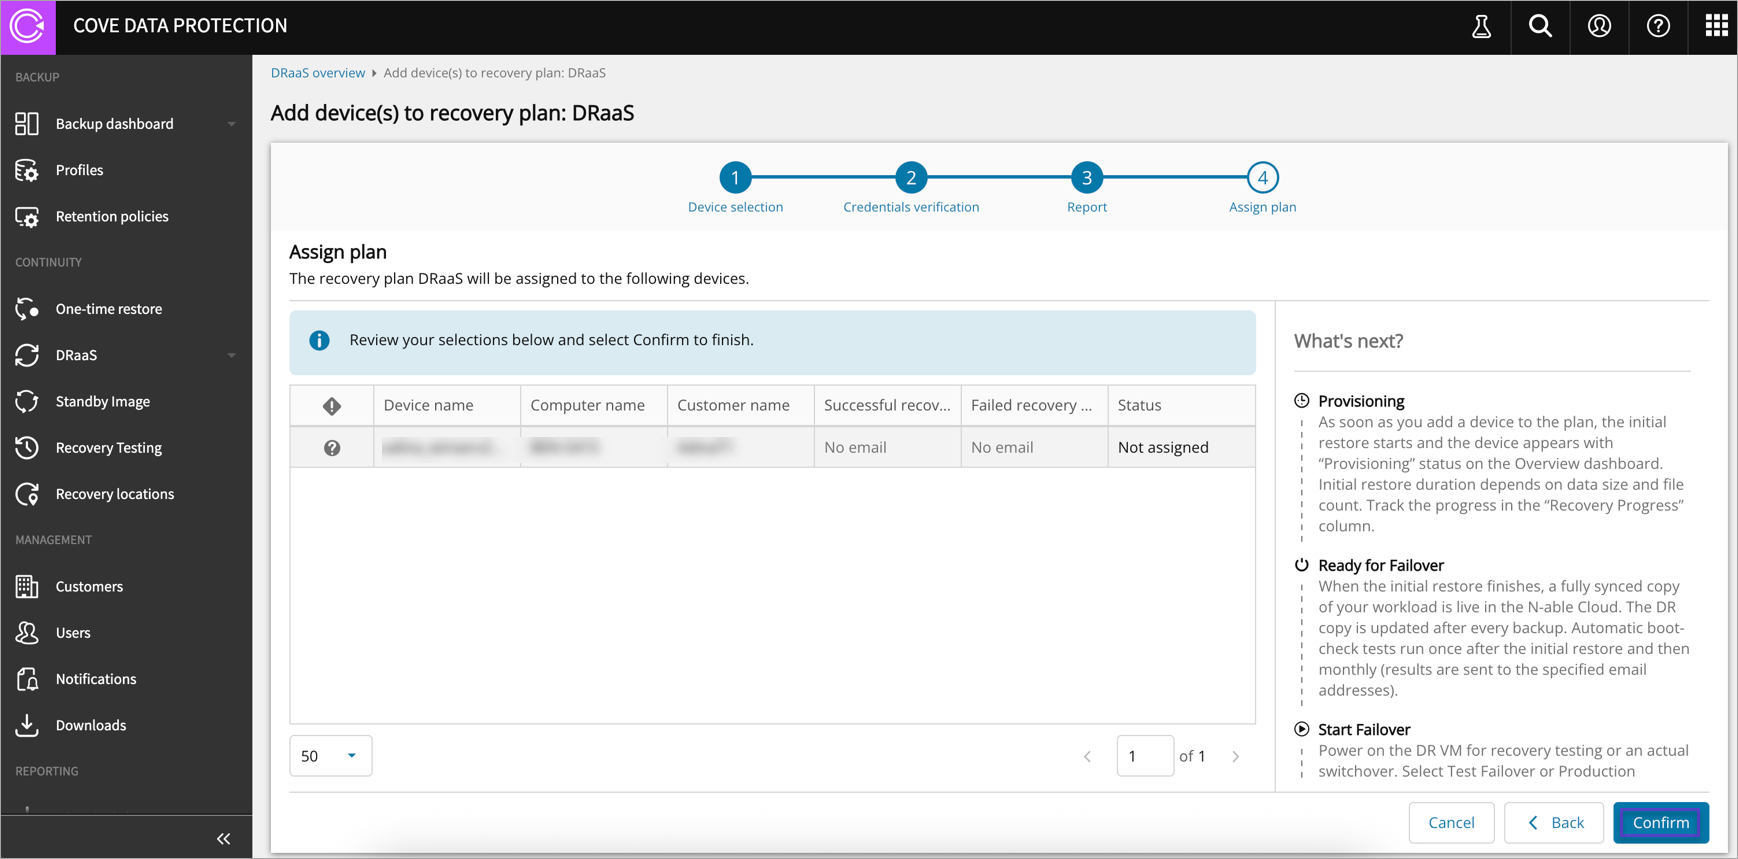
Assign plan
-
Click Confirm
-
Click Done to add a device to plan

-
This is the final step to add a device to Cove DRaaS plan and is also enhanced with the information about the next steps.
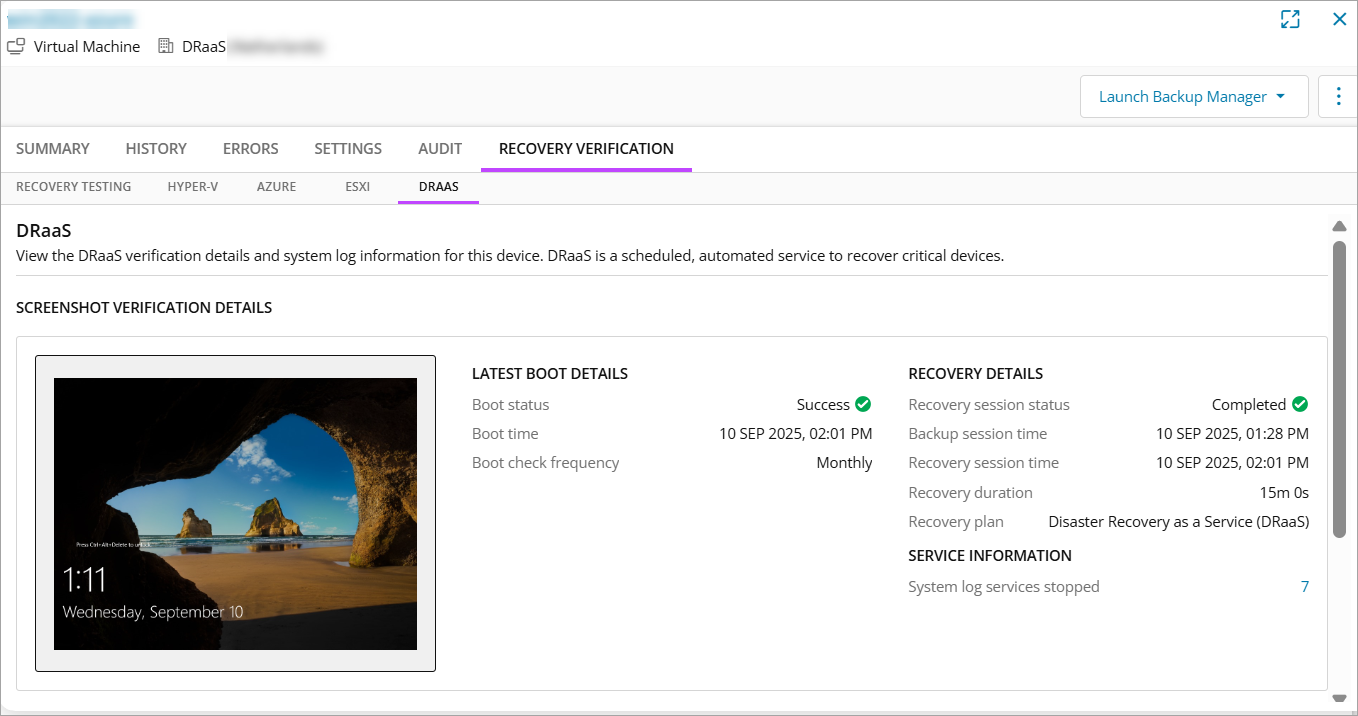
If you open the device properties, you can view the latest boot test results under Recovery Verification -> DRaaS. By default, the IP is set from backup statistics (if several exist, the first is used), and you can update it when the device is not in failover or later during the failover initiation process.
-
Using your Device in the Plan
Now that your device is in the plan, the production device copy exists in our infrastructure, it’s updated according to your backup schedule and monthly boot-testing.
You can start the machine to:
-
Access files or perform checks
-
Run a test failover to verify functionality in a disaster scenario
-
Execute a production failover if a real disaster occurs
To start the Virtual Machine (VM), you need to perform test or production failover.